Digital Marketing Brisbane
High Performance Digital Marketing Agency
Supercharge your digital marketing with campaigns that deliver traffic, leads and sales.

320+
Digital Marketing Clients
Generating results for brands of all sizes across Australia.
2,000+
Digital Marketing Campaigns
High converting marketing campaigns across Socials, Linkedin & Google.
20 Million
Potential Customers
Benefit from our unique database of high quality customers.
Digital Marketing Agency Brisbane
Our Digital Marketing Services
We can take care of everything you need to market your business online from strategy, to content creation, to search engine optimisation and paid social advertising.
The social web is an ever-changing, ever-expanding sea of marketing opportunities. Increase brand awareness and communicate with your customers by using the right social media communication for your brand.
We know how to optimise your website, using advanced SEO strategy and innovation while staying within Google’s guidelines and ensuring your site avoids penalisation.
Our Social Media marketing agency provides innovative and creative strategies to help you market your business onto the world’s most popular social networks, Facebook & Instagram.
Get noticed in Google with our cutting edge search engine marketing services. We provide Search Engine Optimisation and paid search engine marketing for large, medium and small businesses across Australia.
Develop a blueprint for success with an effective content strategy that incorporates email, blogs, eBooks, case studies, infographics and more. Our skilled copywriters will develop relevant and compelling content that transforms passive readers into engaged audiences.
We will develop original and engaging content to promote via your social media channels. We can also create and manage your content calendar to stay on top of your social media network, ensuring you stay active and engaged with your audience.
- LEARN MORE
How Can Digital Marketing Help Your Business?
We help hundreds of businesses across Australia improve their enquiries and sales online our digital marketing services.
Take advantage of high-quality digital marketing channels like Facebook, Instagram and Google Shopping to increase your online sales. Our digital marketing agency can take care of your online strategy, campaign creation and ongoing management.
Our lead generation digital marketing service introduces your business to high-quality potential customers. We combine high engaging ads with optimised landing pages to maximise online enquiries.
Our team of search engine specialists can upgrade your website to improve your search ranking for important keywords related to your product and service.
Our Facebook, Instagram and Google marketing campaigns are designed to find potential customers and generate online bookings and appointments for your business.
Our marketing agency can help you book more sales meetings through high-converting social media and Google marketing campaigns.
Get In Touch With Brisbane's Best
Digital Marketing Agency
Digital Marketing Agency Brisbane
Our Digital Marketing Portfolio
A sample of our high-converting digital marketing campaigns across Facebook, Instagram & Google.


Case Studies & Results
A sample of our results from digital marketing campaigns across Australia.
How We Generated 500k Impressions In 14 Days
ADS SEEN
PEOPLE REACHED
CAMPAIGN VIEWS
USER SIGNUPS
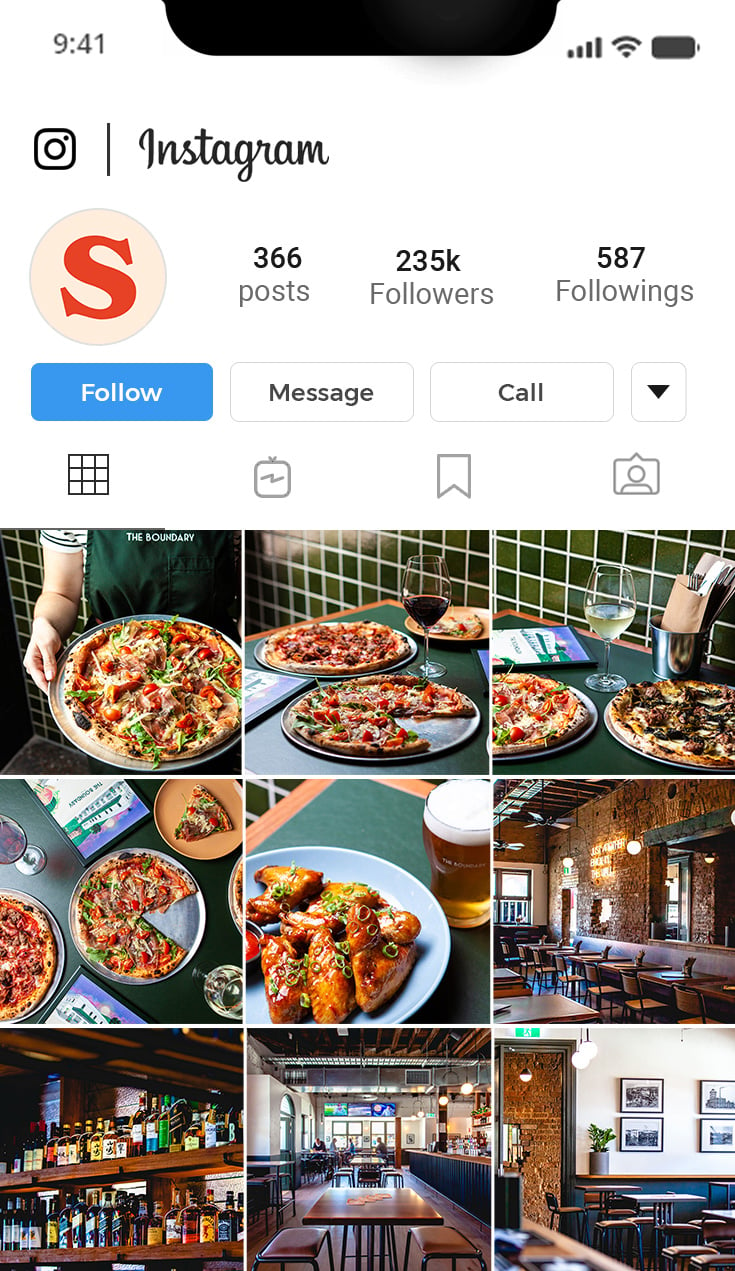
2,020+ Instagram Likes In 9 Days For This Brewery
With 320 days of scorching summer, Townsville needed a place to make big beers that quench an endless thirst. To support the launch of Tiny Mountain Brewing, we put together a targeted social media strategy to position this brand for long term success.
ADS SEEN
PEOPLE REACHED
FACEBOOK FOLLOWERS
INSTAGRAM
LIKES
2+ Million Ad Views For Colonial Brewing Co
We joined forces with Greenpoint Media to execute a powerful brand campaign for Colonial Brewing Co.
We designed a digital amplification strategy across social media networks and display networks to maximise their brand awareness throughout summer.
The campaign blitzed a wide range of industry benchmarks and provided the brand with enormous exposure to new and existing audiences.